Showing posts with label Salisbury caterers. Show all posts

Wednesday, 27 March 2013

Easter recipes #2


Roast leg of lamb

With Easter on the horizon it's time to get thinking about Sunday lunch. The last blog was a relatively easy recipe allowing you to spend time with your family, this one is a bit more 'hands on' but the rewards are worth it. A roast dinner is a simple dinner to put together as long as all the prep work is done in advance. Below is a step by step guide that will hopefully make things run smoothly.

Ingredients (serves 4)
1 leg of lamb
1 bunch of rosemary
3 garlic cloves peeled
6 medium sized maris piper potatoes
Vegetables of your choice
Goose fat
Good quality gravy thickener
Salt and pepper for seasoning
Olive oil
Splash of red wine

Method
First get your oven to 220C and start peeling your vegetables (this can be done a few hours before) and keep the peelings. Put all the peelings and any bits of root vegetables (not the potatoes) you're not using in a sauce pan with a splash of oil and fry for a minute then add the red wine and let it simmer for 2 minutes to burn off the alcohol. Pour in some water (to fill about 2/3 of the pan) and leave to simmer (this will be the stock for the gravy). Peel the potatoes and cut them into roast potato size and leave them in water. Put the leg on lamb in a roasting dish, pour on a little of the olive oil. Make a few cuts into the meat and stuff them with the garlic cloves, season then place some sprigs of rosemary over the meat.

Leg of lamb ready for the oven
Place the lamb in the oven, after 10 minutes take it out, cover it in foil then put it back in the oven for an hour and a half or 2 hours if you prefer it cooked through. In the mean time start cooking the potatoes in boiling water. When you can put a knife easily through them drain them into a colander or sieve and leave to dry out, then 'rough' them up a bit by shaking whatever you have them in. The more edges the potatoes have the more 'crispier' they will be at the end. Heat up the goose fat in an oven tray in the oven until the fat starts to smoke a bit. Pour a little olive oil over the potatoes, season and carefully place them on the oven tray being careful not to splash your self with the oil. Using a spoon cover the potatoes with the goose fat and put them back in the oven. They should take just under an hour to get nice and golden. Every now and then take them out of the oven and turn them over so you get a nice colour on all sides. Get your preferred vegetables cooked, to make things easier you can cook them in advance and heat them up in the microwave if you have one.

Lamb ready to eat!
When the lamb is cooked take it out of the oven put it on a chopping board and cover it in foil to let it rest. Get as much fat out of the roasting dish as you can and place it on the heat, pour the stock from the peelings through a sieve into the roasting dish and get it on the heat. Using a wooden spoon scrape up all the residue left over from the lamb and let it simmer for a few minutes. Pour this mixture back through a sieve into a sauce pan and return it to the heat. Thicken with the gravy thickener and leave to simmer gently. When the lamb has rested carve it up, heat the vegetables and serve! ENJOY!
  
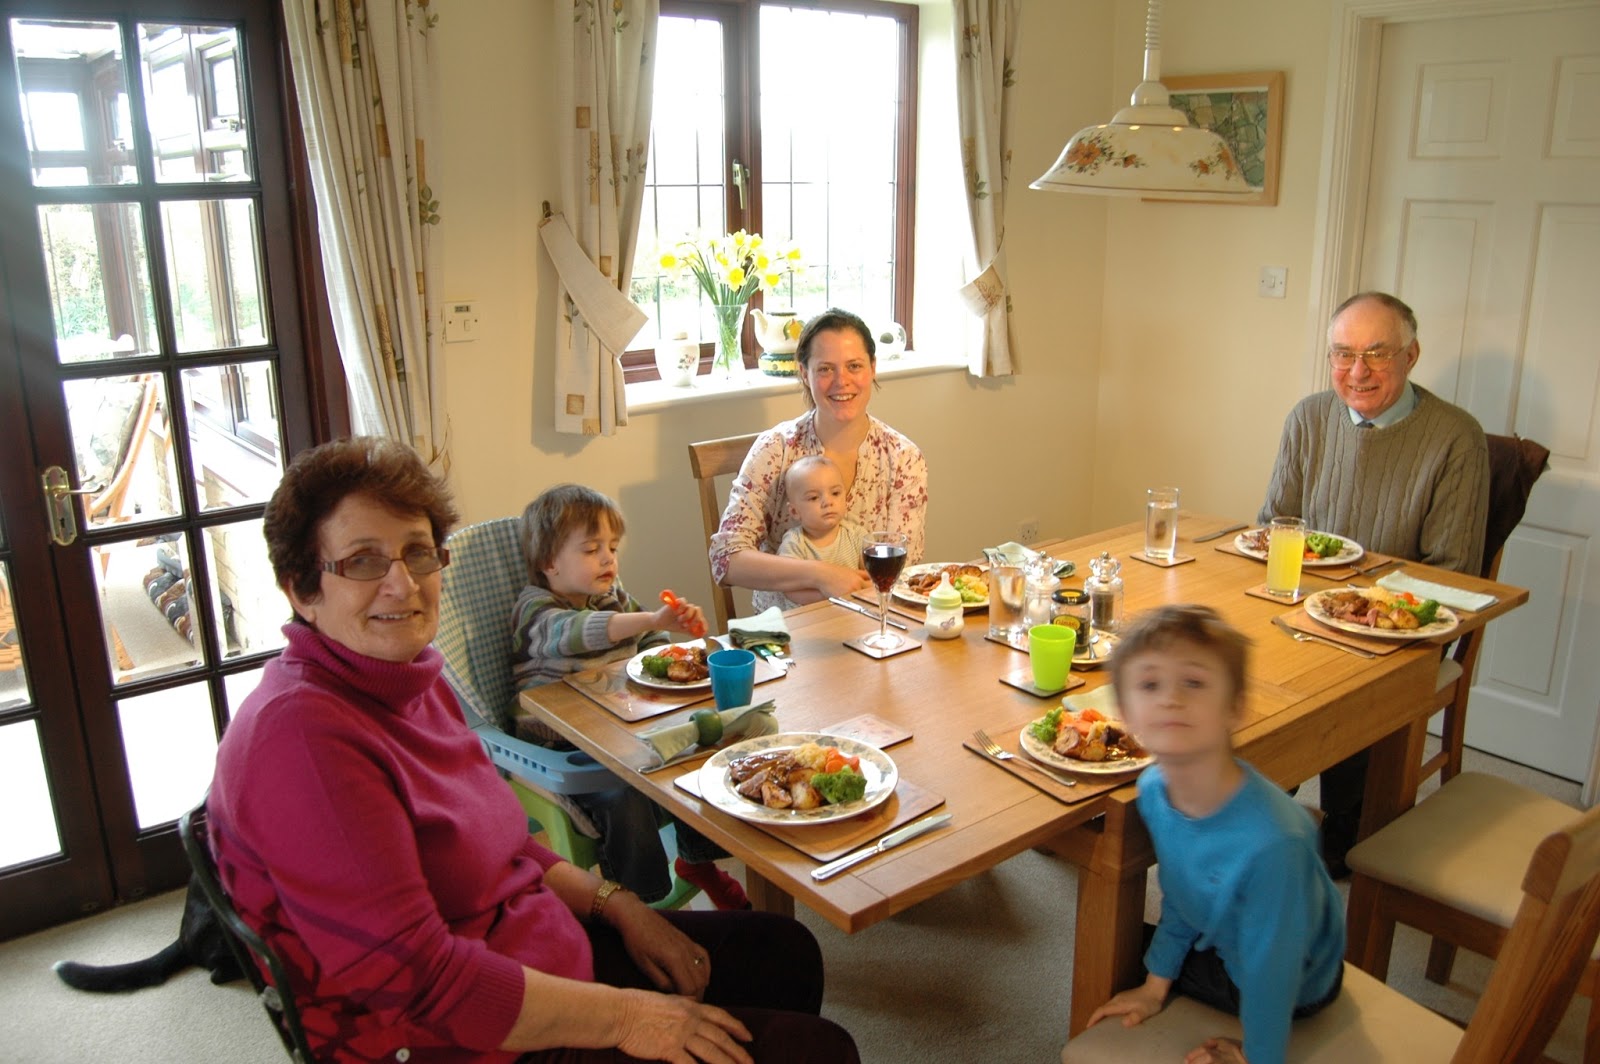
My little family about to enjoy a roast!

Tuesday, 12 March 2013

Individual Beef Wellingtons

The Beef Wellington (not named after the 1st Duke of Wellington, it was apparently invented for a civic reception in Wellington, New Zealand) is a very famous and decadent dish. There are many variations and mine is an adaption of Gordon Ramsey's where he uses Parma ham around the fillet opposed to a crepe, which helps to keep the moisture away from the puff pastry. Instead of using a whole fillet of beef (a bit expensive and you'd need 8 hungry mouths) this recipe is for individual steaks. It's quite a simple recipe so give it a go you'll be glad you did! I served mine on dauphinoise potatoes with purple sprouting broccoli and a red wine reduction.

Ingredients (serves 4)
For the Wellingtons:
4 8oz fillet steaks
250g ready made puff pastry
6 chestnut mushrooms
1/2 red onion finely diced
Handfull of washed spinach
2 gloves of crushed garlic
4 slices of Parma ham
1 sprig of thyme
1 egg beaten
For the dauphinoise potatoes:
4 maris piper potatoes
1/2 red onion sliced
1/2 pint double cream
1 garlic glove crushed
For the red wine reduction:
1/4 of an onion chopped
1 garlic clove crushed
1 pint quality beef stock, thickened
1 glass of red wine
2 tbsp red currant jelly
12 purple sprouting broccoli stems

Method
First take your steaks out of the fridge and let them get to room temperature. Splash a bit of olive oil into a frying pan and get smoking hot, seal the steaks and set aside. Pour some of the red wine into the pan to
de-glaze it and lift up the intense steak flavours left over from the sealing process, keep this liquid. Finely chop the mushrooms and fry them in a pan with the onion, thyme and garlic, when it's cooked (after 2 mins) add a splash of red wine and the spinach and keep cooking until the spinach has wilted, season. Roll out or unroll the pastry on a floured surface and let it get to room temperature (makes it easier to work with). Instead of covering the entire steak in pastry we're going to make a lattice effect with the pastry. You can buy a small roller that does it for you but it can easily be done with a knife:

 
Using a knife measure out the width of each steak and measure it out on the pastry and cut it into a rectangle. Then with a sharp knife cut through the pastry like the picture above. When you've done this gently stretch out the pastry like the picture below:


Top each steak with the fried mushroom and onion mixture (duxelle) and wrap them in the Parma ham. Then carefully lay the pastry over each steak and tuck the pastry underneath and brush with the beaten egg:


The Wellingtons are now ready for cooking and can be stored in the fridge for around 12 hours if needed to. Now it's time to make the dauphinoise potatoes, peel and thinly slice the potatoes. Fry the sliced onions in a little olive oil for a minute then add the garlic and double cream. Then add the potatoes and bake in an oven proof dish at 220C for half an hour or until a knife slides easily through the potatoes.
For the sauce fry the chopped onions for a minute in a little olive oil then add the garlic and red wine. Simmer this mixture for 3 minutes to burn off the alcohol then add the stock and redcurrant jelly. Leave to simmer until it reduces by half.
Cook each Wellington on a greased baking tray at 220C, when the pastry is golden brown then they are medium rare and ready! If you prefer your steaks cooked a little more turn the oven down to 175C and add a further 3 minutes for medium or 7 for well done. Boil some water in a pan and cook the broccoli, once it comes back to the boil add 2 minutes and it's cooked. Place the potatoes in a circular cake cutter in the middle of a plate, pour the sauce around the potatoes put the Wellington on top and place the broccoli on the plate. Now you're ready to impress! Good luck and have fun......


Tuesday, 5 February 2013

Pan fried Bream on chilli and chorizo risotto

Last weekend I catered for a party in the Costwolds and on my way there I decided to give Stroud market a go and see how much of my ingredients I could get from it. Well it turns out Stroud market is a bit good and I managed to get most of my ingredients from Gilt headed bream to various cured meats and locally produced cheeses. I liked it so much that I got some ingredients for myself and here's what I did with them.
Fillet of bream on a chilli and chorizo risotto with beer battered scallops and balsamic reduction
Ingredients: (serves 2)
1 whole bream scaled and gutted
8 scallops (roe removed)
1 cup of risotto rice
Splash of white wine
1 pint of fish stock (or cube, see below if you want to make your own)
10 slices of chilli and garlic chorizo
1/2 red onion finely diced
1/2 green chilli finely chopped (seeds removed)
1/2 green pepper sliced
3 garlic gloves finely chopped or through a garlic crusher
1 knob of butter
Beer batter (lager mixed with self raising flour-the consistency should be thick enough to cover the back of a spoon)
1/2 pint of vegetable oil
Balsamic reduction
Salt and pepper for seasoning.

Method
First remove the two fillets from the bream. You can ask your fish monger to do this for you but ask for the carcass if you want to make your own stock. To make a fish stock fill a pan with cold water add the fish and any root vegetables you have to hand, a few garlic cloves and fresh parsley if you have any. Slowly bring the pan up to simmering point and simmer very gently for about an hour. Strain this through a very fine sieve or muslin cloth if you have one. To get perfectly clear fish stock freeze it then defrost it through a muslin cloth.
To make the risotto firstly fry the slices of chorizo with a little olive oil then add the rice making sure that each grain get covered in the olive/chorizo oil. Then add the onions, garlic, chilli, pepper and white wine. Simmer the wine so it burns off it's alcohol. Pour in the fish stock and let it simmer, when the rice is cooked add the butter, season and set aside with a lid on it. Dip the scallops in flour then into the batter, in a sauce pan carefully heat up some vegetable oil. Season the fillets of bream and heat up some butter and olive oil in a frying  pan. When it's bubbling cook the bream, skin side up first. Cook for about 2 minutes on each side spooning the oil from the pan over the fillets as you cook them. As they are cooking test the heat of the vegetable oil by dropping a bit of the batter in, if it starts bubbling then it's ready. Cook the scallops for about a minute then drain on kitchen paper. To plate I used a circular cake cutter for the risotto, then placed the fillet on it, poured some balsamic reduction around the risotto and placed the scallops on that, as you can see from the photo! Give it a go and bon appetit!


Thursday, 13 December 2012

Private dining - a selection of starters


Some of our most popular starters, bespoke menus are designed for each and every function

  • Malaysian style squid satay with chilli sauce
  • Wiltshire goat's cheese tart with red pepper confit
  • Smoked mackerel and horseradish parfait with melba toast
  • Pan seared scallops in their own shell with a chive cream glaze
  • Chicken liver and port pate with melba toast
  • Warm salad of black pudding with smoked bacon and poached egg
  • Seared pigeon breast with garlic croutons and raspberry vinaigrette
  • Thai style chicken satay with a spicy coconut and peanut dip
  • Tempura king prawn tails with a pineapple and coriander jam
  • Salmon and coriander fish cakes with sweet chilli sauce
  • Rope grown Scottish mussels steamed open in a garlic and white wine cream
  • Classic Caesar salad with parmesan croutons
  • Cornish crab and lobster salad with vegetable juliennes, coriander, chilli and lime dressing.
Email us to discuss your requirements

Tuesday, 13 November 2012

Steak night!

Steak night in our house is my favourite night, and pretty much whenever we eat out I'll order steak. You can always tell how good a chef is by how well their steak is cooked (I don't mean well done!). Everyone has their favourite cut of steak, mine is rib-eye. Here's a quick guide to the different cuts of steaks:

Fillet: The prime cut of steak and the most expensive! Slightly over rated in my opinion. It has very little fat and is very tender, used in dishes like Beef Wellington and for the cuts known as Tournedos and the famous Chateaubriand.

Rib eye (or Scotch fillet to my antipodien friends)My favourite cut of steak, it rivals the rump steak for flavour. The 'eye' of fat in the steak helps to maximise the flavour when cooking.

Sirloin: Spoiler alert!....It was never knighted by an English king! Not the most tender of steaks but it still packs a punch in terms of flavour. A whole strip loin is also great for roasting.

T-bone: For some the T-bone steak is the best of the lot (especially dogs and cats in cartoons!). It has on the one side of the T bone some fillet steak and on the other some sirloin. Cooking food on the bone in my view always enhances the flavour.

Rump steak: The unsung hero of steaks due to it's great flavour and being the least expensive cut. It needs to be cooked quickly as it can become quite tough.

Beef needs to be 'hung' on the bone for at least 28 days good quality butchers would have hung their meat for this long. Most super markets hang theirs for 18 to 21 days. The hanging process really helps to let the flavour of the meat mature gaining greater flavour as it does so. An easy way of seeing how long the meat has been hung is to look at the colour. It the steak is a light red then it hasn't been hung very long. If it's dark red then it has! When buying a steak you want to get one that has a light marbling of fat through it (little specks of fat) this really helps to enhance the flavour during the cooking process.    

Cooking process
Steaks are best cooked at room temperature, if they're cooked when they are cold the proteins in the meat tense up causing the steak to become tough. Take the steak out of the fridge a few hours before cooking to get it to room temperature. Just before you are about to cook the steak brush it with olive oil and season well. Get your griddle or frying pan very hot and begin cooking the steak to your liking, here's some timings to get your steak to how you like it (for a steak that's about 2cm thick) :

Blue: 1 minute each side
Rare: 1 1/2 minutes each side
Medium rare: 2 1/4 minutes each side
Medium-well done: 2 1/2 - 3 minutes each side

When you steak is cooked to how you like it it is important to let it rest for at least 3 minutes to let the juices that have been drawn to the surface to relax back into the meat. I like to serve my steaks with at least one type of veg and homemade game chips-super skinny ones. I also like to top it with a baked field mushroom filled with Stilton, but that's up to you!
8oz Rib Eye steak, with garlic green beans, game chips and Stilton stuffed mushroom.

Monday, 29 October 2012

Pumpkin time!


It's that time of year again super markets are bursting with pumpkins. While most people carve scary faces and put a candle in them there are plenty of ways to cook with them. From pumpkin pie to pumpkin risotto the possibilities are endless. We had a carving competition in our house (I think I won) and had lots of left over pumpkin 'guts'. Rather than throw it in the bin a quick sift through results in a lot of pumpkin seeds. Keep a few back for the garden next year and put the rest on a baking tray drizzle with olive oil and sea salt. Slow roast them at 100C for an hour stirring them as you go and the results are divine. Eat them as a quick snack or sprinkle them over salads.
Slow roasted pumpkin seeds with olive oil and sea salt
Tonight is roast chicken night in our house, I always roast our chickens in a tagine pot it helps to keep the chicken moist and you can add vegetables into the tagine to cook along with the chicken. Tonight I tried chilli pumpkin in the tagine and whenever they are in season we are having them in our roast! Here's how I did it:

Serves 4
Ingredients
1/2 pumpkin skinned and cut into cubes
4 garlic cloves finely chopped
1 red chilli seeded and sliced
1 tsp paprika
Salt and pepper
Splash of olive oil

Method
Put all of the ingredients into a bowl and mix well, when the chicken has been cooking for about 20 minutes add the pumpkin to the tagine cover and cook for a further 45 minutes. If you don't have a tagine use whatever you are cooking your chicken in and cover it with foil. The added bonus of cooking the pumpkin in with the chicken is that as it cooks the pumpkin will soak up all the chicken juices. After 45 minutes has passed remove the tagine's lid or foil, turn up the oven a bit and cook for another 15 minutes to crisp up the pumpkin and chicken skin. Serve with your choice of vegetables and gravy and enjoy!
Roast chicken with goose fat roasted potatoes, steamed broccoli and chilli roasted pumpkin 

Monday, 8 October 2012

Oriental style duck pancakes

As I've mentioned before growing up in Hong Kong really gave me a passion for Chinese food, both cooking and eating it. As a pub chef I often used to put on themed nights and Oriental night was always very popular both with the customers and my brigade of chefs in the kitchen.
These duck leg pancakes are a version of the great Peking Duck, you can opt to use a whole duck (if your feeding a few people!) or duck legs as I've done here. Another option is to buy the Oriental pancakes but if you prefer to give making them a go it's really simple.

Ingredients (serves 2 people)
2 large duck legs
180g Goose fat
2 tbsp honey dissolved in warm water
Sweet chilli sauce
Hoi sin sauce
1/2 cucumber sliced finely
8 spring onions sliced finely
For the pancakes:
225g plain flour
155ml boiling water
1 tsp vegetable oil
Roasted sesame oil

Method
Place the duck legs on a wire rack over a plate or baking dish and pour boiling water over them to tighten the skin. While the duck legs are still warm brush them with the honey and water solution and leave to stand in a cool and airy place for at least 6 hours or over night in a fridge.
Heat some oil in a frying pan and seal the duck legs. Place them in a roasting tray skin side down with the goose fat, cover with foil and roast in an oven at 150C after an hour turn the legs over, cover with foil and roast for another hour.
As this is going on it's time to prepare the pancakes. Sift the flour into a bowl, slowly pour in the boiling water, then add the vegetable oil and knead into a firm dough. over with a damp tea towel and set aside for 30 mins. Turn the dough onto a floured surface and knead for 10 mins or until it becomes smooth. Divide the dough into equal sized balls, the picture below will give you a rough idea of how big.
Dough balls ready
Press the dough balls with the palm of your hand into a flat disc. Brush one disc with a little sesame oil and put another disc on top. Using a rolling pin flatten each pair of discs into a 15cm pancake. Heat an ungreased  wok or frying pan over a high heat, then reduce the heat to low and put the pairs of pancakes (one at a time) into the pan. When brown spots start to appear flip them over and cook the other side.
Pancakes cooking
When the second side is cooked lift the pancakes out and carefully peel them apart (they will be HOT!). Fold each pancake in half with the cooked side facing inwards and set aside under a damp cloth. 

Just before serving steam the pancakes for about 10 mins. When the duck legs are cooked heat the oven up to 220C take off the foil and cook for a further 5 mins to crisp up the skin. Take them out of the oven and place them on a wire rack.
Crispy duck legs!
When the legs have had a minute or two to cool a bit shred them with a fork, serve with the pancakes, spring onion, cucumber, sweet chilli and Hoi sin sauce and enjoy! Man man chi!

Monday, 1 October 2012

My most popular lamb dish

As the Wiltshire chef I do a lot of fine dinning dinner parties in peoples homes. Needless to say the host always wants to 'wow' their guests with the food, the most popular main course dish is Rack of lamb with a goat's cheese and rosemary crust served on dauphinoise potatoes with a redcurrant and port jus. A bit of a mouthful (no pun intended) I know but below I'll talk you through each step.

 Ingredients (serves 4)
4 x 3 bone rack of lamb
Dijon mustard
2 x slices white bread
1 x sprig of rosemary
2 x slices goat's cheese
4 x maris piper potatoes
1/2 x sliced onion
1/2 pint double cream
1 x garlic glove crushed
2 x shots of port
2 x tbl spoons of redcurrant jelly
1 x pint quality beef stock (thickened)

Rack of lamb with a goat's cheese and rosemary crust
Method
Firstly ensure there are no bits of meat left on the exposed bones by scraping them off with a knife. Then seal the racks in a hot frying pan ensuring all of the lamb is seared on the outside. In a food processor blitz together the rosemary (taken off the stalk), bread (tear it up, makes things easier), goat's cheese and seasoning. Brush the side of the rack opposite the the bones with the Dijon mustard then press the processed mixture onto the mustard and ensure it sticks. Roast the racks in an oven at 220 C for 15 minutes (serve pink, if you don't like pink meat then roast them for a further 5 minutes).
To make the dauphinoise potatoes peel and thinly slice the potatoes. Fry the sliced onions in a little olive oil (keep some back for the sauce) for a minute then add the garlic and double cream add the potatoes and bake in an oven proof dish at 220 C for half an hour or until a knife slides though the potatoes. 
To make the sauce (or jus if you want to sound like a pro!) heat some olive oil in a sauce pan then fry the onions for a minute then add the port (careful it might ignite!) and let it simmer for a minute to burn off the alcohol, add the redcurrant jelly, beef stock and the stalk from the rosemary and simmer. Reduce by a third and strain through a sieve into another sauce pan. 
When I cook this meal I would prep the lamb first, then make and cook the potato. Then I would make the sauce and finally roast the lamb. When plating up I use a circular cake cutter in the center of a plate and fill it with the potatoes. Then I would cut the lamb in half and place it on the potatoes and spoon the sauce around the potatoes. I normally serve it with purple sprouting broccoli and garnish it with a sprig of rosemary or thyme. Good luck and have fun!


Monday, 20 August 2012

Sun-dried tomato and Parmesan bread

My wife (who is a bit pregnant wife with our 3rd child-3 weeks to go!) recently treated me to a night of home made tapas. I won't make you jealous with what we had but the day after the great feast we had some left overs. After making a few dishes my mind wondered off into bread making, shall I make something really 'out there' or stick to something people might actually like? Common sense prevailed so I decided on sun-dried tomato and Parmesan loaf. This recipe is very easy the only thing that you have to stick at is the kneading stage you must keep going for at least 10 minutes otherwise the final cooked loaf will be too stodgy.

Ingredients
(Makes enough for 4)
425g strong white bread flour
1 tsp salt
225 ml tepid water
Good sized pinch of dried oregano
40g finely grated Parmesan
50g chopped sun dried tomatoes drained
7g easy bake yeast

Method
Preheat your oven to 220 C then mix all the ingredients in a bowl (pouring in the water last) until it forms a rough dough. Tip out onto a floured surface and knead for at least 10 minutes until it becomes smooth and elastic.
Dough ball ready for kneading
Put the mixture into a greased oven proof bowl and poke it with a finger to make small indentations. Sprinkle with sea salt and brush with the oil left over from the tomatoes. Cover with clingfilm or a damp kitchen cloth and leave for 40 minutes in a warm place for it to double in size.

Ready for the oven
Bake the bread for round 30 minutes until it's golden brown. When you take it out of the oven tap the bottom of the bowl, if it sounds hollow then it's done.

Time to eat!
This bread is best eaten straight out of the oven but it will last for at least 4 days if stored correctly. Serve it with olive oil and balsamic or whatever takes your fancy. Enjoy!

Give it a try, you'll love it.

Monday, 13 August 2012

Salted trout

After a successful fishing trip with my eldest son (see my previous blog) we had 2 rather large trout to deal with. Here's one of the recipes that we used to enjoy these fantastic fresh water fish.
Before refrigerators salt was commonly used to extend the life of fresh produce, salting fish was widely used in northern Europe. In Sweden they came up with the idea of salting fish and burring it underground. The salmon version of this is known as Gravadlax, the lax part literary translated means salmon and the gravad  means 'buried'. I have been reliably informed by a Swedish friend of mine that the trout version is called 'gravadoring'. So here goes...

Ingredients:
2 trout fillets pin boned (all little bones removed)
Sea salt crystals
1 lemon zested
Dijon mustard
Chopped chives (or dill)
Bread to serve (I made sun dried tomato and Parmesan bread-blog to follow)
Wedge of lemon to serve

Method:
Pat dry both fillets with kitchen paper and lay one of them on a large rectangle of cling film. In a bowl mix together the salt and lemon zest and spread liberally over one fillet.


Top this fillet with the other..


Then wrap them very tightly in cling film..


At this point if we didn't have a fridge we would bury it under the cold European earth, but we do so into the fridge it goes for 12 hours to 'cure'. After it's done it's thing in the fridge unwrap it from the cling film and lightly wash the salt off. Pat it dry with kitchen paper an spread Dijon mustard over both fillets. Finely chop the chives/dill and sprinkle over the fillets.


Using a sharp knife slice the trout at around 45 degrees, serve with bread and a slice of lemon and enjoy!

Photo courtesy of my wife  


Saturday, 4 August 2012

Fishing for trout with my eldest son

We recently went on our first family camping trip to the sea side. My eldest son was desperate for a fishing rod so I gave in and got him a kids fishing rod. It was a bit rubbish and whilst down on the local pier we didn't catch a thing, no surprises there. So when we got home I promised him we'd do some 'proper' fishing. So a couple of afternoons ago we went to our local trout fishery, there were people there with their professional equipment, silly hats and camouflaged jackets. James and I turned up with his little fishing rod, a few hooks and a loaf of bread, we got a few looks but we were about to have the last laugh. First cast and boom! Line snapped! 15 minutes later and we had 2 rather large trout in our cool box! We didn't see anyone else catch anything and got back into the car feeling a bit proud of ourselves.
Trout!

When we got home I asked 'James shall we have fish for dinner?' 'The fish we caught? No way!'  Fair enough, so it was up to me and my wife to eat the freshest fish we've ever had in our house. I wanted a dish that would reflect the freshness of the fish and decided on Trout ceviche Oriental style. Here's the recipe:

Serves 2
2 fillets of trout (pin boned)
Juice of 2 limes
Splash of balsamic vinegar
Splash of olive oil
1/2 chilli
1 garlic glove
1/2 a bunch of coriander
Seasoning
A few lettuce leaves
8 cherry tomatoes


Blitz all of the ingredients in a food processor (except the fish, lettuce and tomatoes). Slice the trout into strips, cover the fish with the processed ingredients and leave for 20 minutes. Arrange some of the lettuce and tomatoes on a plate top with the fish and serve! Enjoy!

Tuesday, 19 June 2012

Bailey's and chocolate cheesecake


Rather indulgent Bailey's and Chocolate cheesecake 


This dessert is a big favourite and always impresses, my wife and I liked it so much we had it as our wedding cake! Bailey's and chocolate are perfect together, any type of chocolate will do (white, dark etc.) and as we're using chocolate it will set the cake so no gelatin or baking is needed. It's quite a simple dessert and can be made in under half an hour, so here goes:


Ingredients:

Serves 4

300g soft cheese

3 digestive biscuits

1 tsp caster sugar

1 tsp vanilla essence

75g good quality chocolate

75ml Bailey's 

15g butter

3 tsp icing sugar


Method:

First melt the butter then put it in a food processor with the digestives, vanilla essence and caster sugar. Blitz until it looks like wet sand. Cover the bottom of the cheesecake tin with grease proof paper and put the mixture onto it and press down with the back of a spoon making sure it all sticks down. Pop it in the freezer to set. 

Melt the chocolate in the microwave (in 20 second bursts) or in a glass bowl over simmering water. When it's melted leave it to cool slightly, mix all the other ingredients in a bowl add the chocolate and mix well. Spoon the mixture on to the base and smooth the top of the cheesecake with the back of a large knife. Leave to set overnight in the fridge. Serve with vanilla ice cream or chocolate dipped strawberries. Enjoy!

Tuesday, 12 June 2012

Amesbury Carnival and the left over onions

My wife and I selling Wiltshire sausages
My wife (who's 6 months pregnant with our 3rd child) and I recently had a stall at the Amesbury Carnival. Last year we went as customers but this year we thought having a stall selling Wiltshire sausages might be a good idea, we didn't realise what a good idea it was going to turn out to be! I arrived early with our eldest boy and started setting up. From the start it looked like we had a good pitch as we weren't tucked away with the druids and their healing stone but more right it the middle of it all. The other bonus was there was only one other hot food outlet, one of those burger vans selling (in my opinion) over cooked over priced burgers and chips. We got the BBQ lit around 11.30 and my parents turned up to give a hand with the baby sitting/onion chopping/serving sausage baps. It must have been the smell of yummy (technical chef term #1) sausages and frying onions wafting through the air because within minutes we were off! The queue grew and grew and for about 2 hours it was 30+ deep.
The people of Amesbury queuing for quality food!
Keeping up with demand on a charcoal fired BBQ was a bit testing at times but 3 hours later the queue had got into single figures and we had sold some where in the region of 350 Wiltshire sausage baps. We packed away and headed to the best place the celebrate, the pub. Pint of larger for me, orange juice and lemonade for my wonderfully pregnant wife who some how managed to stay on her feet all day working her socks off. We both sat there in a bit of a daze not really knowing what had just happened, but one thing was for sure we totally nailed it!
My wife serving with my mum and I cooking in the back ground
Back home unloading the car I realised we had a fair bit (half a sack) of onions left over. I made French onion soup and various chutneys, but the one dish I hadn't made for a while was onion bhajis. Growing up in Hong Kong there was always a large Indian influence and the curries were second to none. I tried out a few recipes adding different ingredients, but the one I was most happiest with is the one I'm going to share with you, so here goes:  


Ingredients
Serves 4
2 large onions (sliced length ways)
3 tbsp plain flour 
1 tsp curry powder
1 tsp cumin
1 tsp crushed toasted cumin and mustard seeds
1 tsp chopped coriander (optional)
1 tbsp good quality mango chutney
Seasoning-slightly more pepper than salt to bring alive the spices
Vegetable oil for frying
Chilli sauce or yoghurt and mint dip

Method
Gently fry the onions in some butter and vegetable oil until they become soft and opaque, leave to cool. Mix all the other ingredients (not the oil!) and onions until it forms a paste. Either using a spoon or your fingers drop golf ball sized balls of the mixture into hot oil and fry until they become golden brown. Set aside on some kitchen paper and repeat until all of the mixture is gone. Serve immediatley, at this point the bhajis will be soft and gooey (technical term #2) which is how I like them, if however you prefer them slightly more crunchy then 5 minutes in the oven should do it.
Enjoy!

Tuesday, 29 May 2012

Coronation chicken

With the Jubilee weekend  getting closer I thought it was time I shared my Coronation chicken recipe. The recipe was invented by Constance Spry and Rosemary Hume for the Queen's coronation in 1953. I've made a few adjustments to the original recipe to bring it a bit more up to date.

Ingredients (serves 6)
500g free range chicken breast
1 onion finely chopped
1/2 tbsp cider vinegar
2 tbsp mango chutney
Zest and juice of 1/2 lemon
100ml mayonnaise
100ml crème fraiche or Greek yoghurt
60g toasted flaked almonds
2 tbsp chopped parsley
2 tbsp chopped coriander
1 tbsp mild curry powder
1 tbsp tomato puree
1 chicken stock cube
Salt and pepper for seasoning

Method
Bring a pan of water to the boil with the chicken stock cube, add the chicken breasts. Reduce to simmer and cook for around 8 minutes. When cooked remove from the water and set aside to cool. In a bowl mix together the rest of the ingredients, slice the chicken when cool and add to the mixture and season. If possible leave the mixture over night as the flavours will improve. Serve with a garnish of watercress.
Alternatively serve it rolls garnished with pomegranate seeds. Have a great Jubilee weekend!


Tuesday, 22 May 2012

Canapes


Mozzarella with Chorizo, basil and olive 


As the Wiltshire Chef I get asked to cater for many functions/dinner parties and a lot of people like to start things off with a few canapes. I recently catered for a wedding at the Inner Temple in London for 160 people where instead of a starter they wanted canapes. The 10 canapes they chose looked very impressive as the waiters and waitresses circled the 'Parliament room.' The canape that was the most well received was my chicken liver and port parfait (see below).


So if you're thinking of having a fine dining evening at your own home and would like to get your guests appetites going with an assortment of canapes then please get in contact at www.thewiltshirechef.com

You could chose from the list on the website or we could have a consultation and design a more bespoke menu. I hope to be cooking for you in the near future!


Visit our full website for more canapé ideas


Smoked salmon and chive cream cheese roulade

Friday, 4 May 2012

Baked Alaska with an industrial blowtorch

A few years ago, as a single guy, I discovered that one the best and easiest crowd pleasers is to produce Baked Alaska at the end of a meal, or a just a surprise addition to few mates getting together for a few drinks. The wow factor is huge, and people who are resolute in 'no dessert for me' quickly change their minds.

The recipe is pretty simple too;

Make a simple sponge
Whisk egg whites in a very clean bowl until it starts turning white, then add sugar
Continue to which until peaks start to form or until you can turn the bowl upside down without the contents falling out (!)
Spoon a generous dollop of vanilla ice cream onto the sponge, cover completely with the egg-white mixture
Blow torch gently until it starts to brown, and serve!


Serve, and enjoy!

Thursday, 22 March 2012

Garlic and ginger king prawn stir fry with a timbale of coconut rice topped with tempura tiger prawn


I grew up in Hong Kong so Oriental food has a very special place in my heart. The smell of onions, garlic and ginger frying take me right back to my childhood for me there is no better smell! The idea behind stir fry's is that they are cooked very quickly at a high heat. When they are served they should have a 'breath of the wok'. 


Ingredients(serves 2)

18 tiger prawns shelled and de-veined (keep one back for the tempura prawn)

1 cup of rice

1 tin of coconut milk

1 chilli seeded and finely chopped

4 garlic cloves crushed

25g of ginger finely diced

2 tbsp of oyster sauce

1 red onion finely diced

8 pieces of mange tout

8 baby corn sliced in half

4 florets of broccoli

1/2 a red pepper finely sliced

4 spring onions sliced

1/2 cup of chopped corinder

Oil for deep frying (for the tempura prawn)

1 egg

1 cup ice cold water

1 cup of all purpose flour sifted


Method

Cook the rice in a sauce pan with the coconut milk, add some water if it starts to dry out during the cooking process. 

To make the tempura batter beat the egg in a bowl, add the iced water and flour and mix lightly be careful not to over mix. Heat the oil for deep frying.

Heat a splash of vegetable oil in a wok and get smoking hot. Add the onion, chilli, garlic and ginger, fry for 30 seconds. Add the prawns and all vegetables except the spring onions and coriander. Deep fry the tempura prawn until it floats, then remove and leave on some kitchen paper. Add the spring onions, coriander and oyster sauce to the stir fry mix and stir well. Place the cooked rice in a timbale and turn onto a plate and top with the tempura prawn. Divide the stir fry mix between 2 plates, serve and enjoy!


Fillet of Haddock with cauliflower puree, dauphinoise potatoes and an oyster and chive cream


This recipe is a bit more hands on, but well worth the effort. Make sure your fish and oysters are nice and fresh.

Ingredients:
(serves 2)

2 fillets of haddock

4 live oysters

1 red onion diced

8 florets of cauliflower

500ml double cream

2 garlic cloves crushed

250g butter

200ml white wine

2 spring onions sliced

Salt and pepper

Flat parsley leaves
Method


Firstly trim your haddock into nice sized fillets. Place the trimmings in a pan with water, skin of the onion and any other bits you may have lying around that would be good for the fish stock. General rule for stocks are vegetables that grow under ground are good. Simmer the stock VERY gently otherwise it will become cloudy. Simmer for no more than an hour then strain through a fine sieve.

Slice the potatoes quite thin, put them into a sauce pan, cover with cream add 1/2 the onion and some garlic. Season and simmer gently for 10 mins (this gives the dauphinoise a head start before you put them in the oven). Pre heat your oven to 220c and put the potatoes in (make sure your sauce pan is oven proof!)

Bring the cauliflower to the boil in some salted water and continue to boil till tender. Drain then put them in a blender with a nob of butter and a splash of cream, season then blend till fine. Pass through a fine sieve and return them to the sauce pan.

In another sauce pan melt a knob of butter and add the other half of diced onion. Fry for a minute then add the garlic and shucked oysters. Fry for 30 seconds then add the white wine, simmer the wine until the alcohol burns off (about a minute) . Add the double cream, season and leave to simmer very gently.

Now would be a good time to check the potatoes, if a knife sinks through them then they're done. Cover with foil and leave them on the side, they will retain their heat.

Heat a frying pan with a splash of oil and a knob of butter. Season the haddock and fry skin side down for 30 seconds, carefully turn over fry for another 30 seconds then into the oven for 5 minutes.

While you're waiting heat up the cauliflower, check the sauce for seasoning and get your garnishes ready (sliced spring onion and parsley leaves). Arrange as per the photo, serve and enjoy!


Tuesday, 20 March 2012

Scallops wrapped in Parma ham with Chorizo and Watercress salad

For me nothing says Spanish food more than Scallops and Chorizo. The two were made for each other, wrapping the Scallops in Parma ham keeps the Scallops nice a moist and adds a bit of saltiness to them, the peppery watercress give some natural goodness and balance to the dish.


Ingredients (Serves 2)


6 Scallops with the roe removed

6 slices of Parma ham

6 slices of Chorizo

Handful of washed watercress

Pepper for seasoning
Method


Wrap each scallop in Parma ham, one layer of ham will do so it cooks evenly. Heat a small splash of olive oil in a pan and when hot add the sliced chorizo, turn after a minute then add the scallops. Cook the scallops for 30 seconds each side and remove from the heat. Dress the watercress in a little olive oil and arrange on the plate. Season the scallops with cracked pepper and place on the plate on top of the chorizo. Serve and enjoy!


Sunday, 18 March 2012

Salt and pepper Calamari


Ingredients:
(Serves 4)

3 squid hoods cleaned and turned inside out

Plain flour

Salt and pepper

1/2 tsp paprika

Oil for frying

Sweet chilli sauce (for the dip)
Method


Put the flour in a bowl and season with the salt and pepper and add the paprika. Slice the squid hood into rings and pat dry with kitchen paper. Put the rings in the flour and mix so they have a flour dusting. Then put them into a sieve and shake so any excess flour comes off. Heat the oil in a pan (it's hot enough when you drop a cube of bread in it and it starts to fry). Fry the dusted rings for 30 seconds (no more) and drain on kitchen paper. Serve immediately with the dipping sauce and a wedge of lemon. Serve and enjoy!